
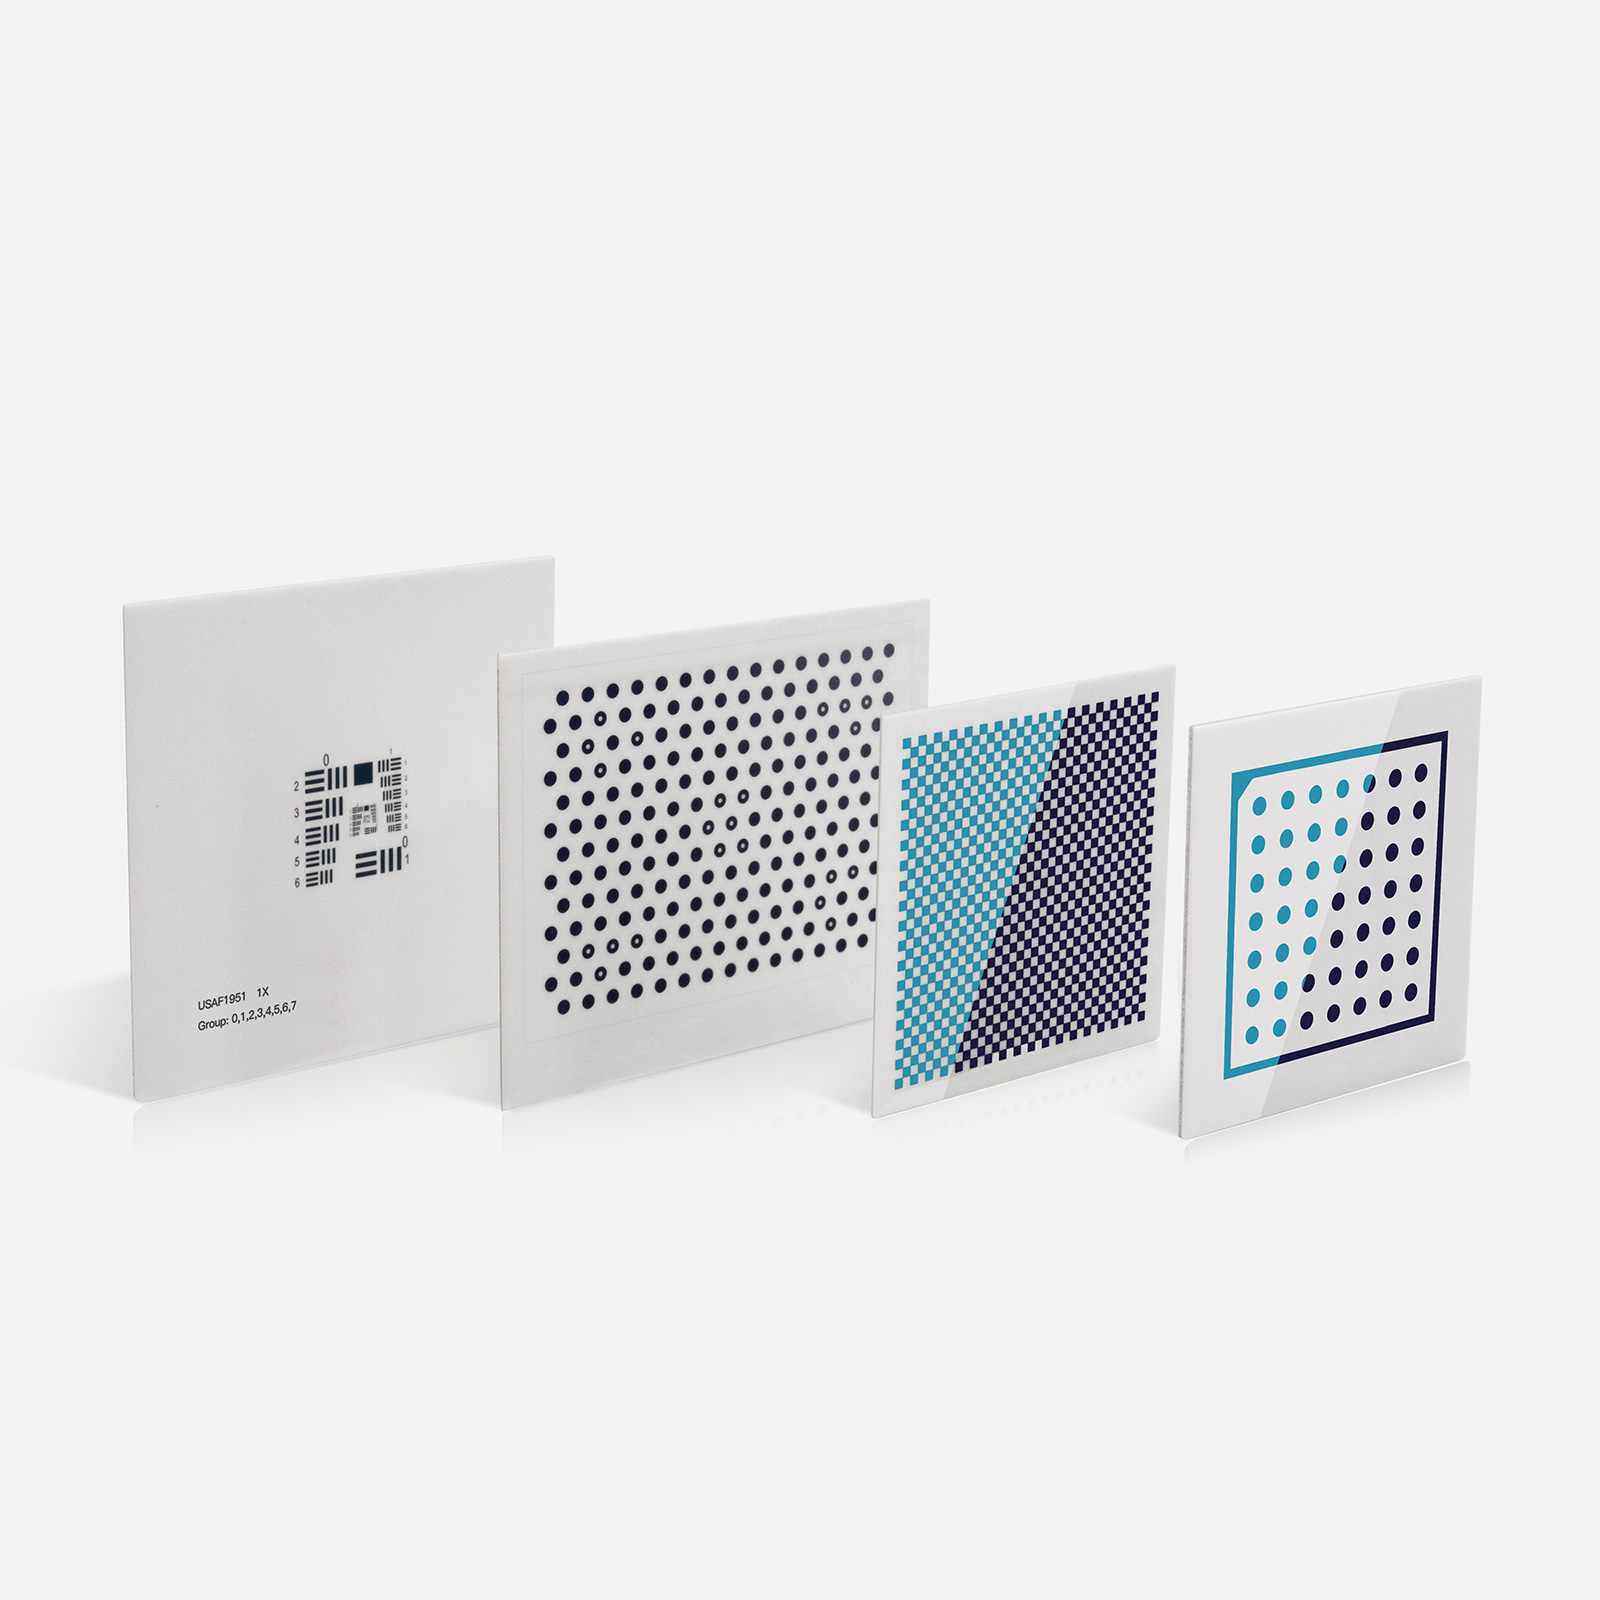
Choosing the right calibration target is not simply a matter of buying the highest-accuracy plate available.
The correct target depends on four main decisions:
Pattern → Material → Size → Accuracy
The pattern must work with the calibration algorithm. The material must provide the stability required by the application. The target size and feature dimensions must suit the camera field of view and working distance. Finally, the target accuracy must be appropriate for the measurement performance the imaging system is expected to achieve.
A practical buying process is:
- Choose the calibration pattern required by the software or algorithm.
- Choose the target material based on rigidity, flatness, environment, and required stability.
- Choose the overall target size and individual feature size based on the field of view and imaging conditions.
- Choose target accuracy so that target geometry does not become a significant source of calibration error.
What Is a Calibration Target and What Should You Check Before Buying One?
A calibration target is a reference object containing precisely defined geometric features that an imaging system can detect during calibration.
Depending on the application, these features may include:
- Checkerboard corners
- Circular dots
- Asymmetric circle patterns
- Custom geometric features
- Software-specific calibration patterns
The target provides known geometric references that the calibration algorithm compares with their detected positions in the captured image.
Before buying a calibration target, check:
- Pattern type
- Compatibility with the calibration software
- Number and arrangement of features
- Feature dimensions
- Overall target dimensions
- Target material
- Pattern accuracy
- Flatness
- Surface contrast and reflectivity
- Working distance
- Camera field of view
- Mounting and environmental requirements
The first decision should be the pattern.
Step 1: How to Choose the Right Calibration Target Pattern
Choose the calibration target pattern according to the calibration algorithm, not according to which pattern appears more precise or more complex.
Different algorithms detect different geometric features.
One system may locate checkerboard corners, while another detects the centers of circular dots. A target can be manufactured accurately and still be unsuitable if its geometry does not match the calibration method.
Before ordering a target, determine:
- Which pattern the software supports
- How many rows and columns are required
- Whether the algorithm detects corners or dot centers
- Whether the pattern is symmetric or asymmetric
- Which physical feature dimensions must be entered into the software
- Whether the software expects a specific coordinate convention
The correct calibration target must match both the algorithm and the physical imaging setup.
Checkerboard vs Dot Grid: Which Calibration Pattern Should You Choose?
Checkerboards and dot grids are two of the most common calibration patterns, but they are not interchangeable in every workflow.
Choose a Checkerboard When the Algorithm Detects Corners
A checkerboard contains alternating light and dark squares.
The important calibration features are normally the intersections between adjacent squares.
Checkerboards are widely used for:
- General camera calibration
- Lens distortion calibration
- Stereo-camera calibration
- Machine vision development
- OpenCV-based calibration workflows
For OpenCV checkerboard calibration, an OpenCV Checkerboard Camera Calibration Target on Ceramic is one possible format when a rigid ceramic substrate matches the application.
An OpenCV Checkerboard Camera Calibration Target is another option when its pattern, dimensions, and construction match the calibration setup.
Choose a Dot Grid When the Algorithm Detects Circle Centers
Dot targets contain circular features arranged in a known geometry.
Instead of detecting checkerboard intersections, the calibration algorithm determines the center position of each dot.
Dot patterns are commonly used in industrial calibration systems and software that explicitly supports circular calibration marks.
For a HALCON workflow, a HALCON Dot Calibration Target may be appropriate when its pattern format matches the calibration procedure being used.
Which Pattern Should You Buy?
The rule is direct:
If the software expects checkerboard corners, choose a checkerboard.
If the software expects circular calibration marks, choose the required dot pattern.
Do not substitute one pattern for another unless the calibration algorithm explicitly supports it.
Does Your Calibration Target Need to Match OpenCV, HALCON, or Other Software?
Yes. The calibration target must match the feature-detection method and geometric definition used by the software.
Software compatibility should be checked before the target is purchased.
For a checkerboard target, confirm:
- Number of squares
- Number of detectable internal corners
- Square dimensions
- Pattern orientation
- Coordinate definition
For a dot target, confirm:
- Number of rows and columns
- Dot diameter
- Dot spacing or pitch
- Symmetric or asymmetric arrangement
- Coordinate origin and orientation
A common mistake is to buy a target first and configure the software afterward.
The correct order is:
Check the calibration algorithm first, then specify the target.
Even a highly accurate target cannot produce a valid calibration if its geometry is interpreted incorrectly by the software.
Step 2: How to Choose the Right Calibration Target Material
Once the pattern has been selected, choose the target material according to the physical requirements of the calibration setup.
Material can affect:
- Rigidity
- Flatness
- Dimensional stability
- Surface reflection
- Weight
- Handling
- Environmental stability
- Available target size
For applications where flatness and dimensional stability are critical, rigid substrates such as glass or ceramic are commonly preferred.
For larger targets or applications where lower weight and easier handling matter more than maximum geometric stability, film or paper-based materials may be more practical.
Glass vs Ceramic vs Film vs Paper Calibration Targets: Which Material Should You Choose?
The main differences are physical rather than algorithmic.
| Material | Rigidity | Dimensional Stability | Surface / Handling Characteristics | Typical Use Direction |
|---|---|---|---|---|
| Glass | High | High | Fragile; reflections may need to be controlled | Precision and fine-feature targets |
| Ceramic | High | High | Rigid and suitable for repeated handling | Industrial calibration and repeated use |
| Film | Low | Depends strongly on mounting | Lightweight and easy to produce in larger formats | Large or lightweight targets |
| Paper / PE | Low | More affected by mounting and environment | Economical and easy to replace | General or temporary calibration |
Glass
Glass provides a rigid and dimensionally stable base for fine geometric patterns.
Its main practical considerations are fragility and surface reflection.
A Custom Black Coating on Glass Test Calibration Target may be considered when a custom glass-based pattern and its specifications match the project.
Ceramic
Ceramic provides a rigid substrate suitable for repeated use and applications where stable planar geometry matters.
A Custom Chrome-on-Ceramic Test Calibration Target may be considered when its construction and achievable specifications match the calibration requirements.
Film
Film offers low weight and flexibility in target size.
Its performance depends strongly on how it is mounted. Bending, stretching, wrinkles, or an uneven support surface can change the actual geometry of the calibration pattern.
A Custom Film Test Calibration Target may therefore be useful where a larger or customized format is needed and a flexible substrate is compatible with the required accuracy.
Paper or PE
Paper and PE-based targets are practical where cost, replaceability, or large dimensions are more important than maximum dimensional stability.
They are generally better suited to less demanding calibration tasks than to precision dimensional metrology.
When Should You Choose a Glass, Ceramic, or Film Calibration Target?
Use this decision logic:
Choose glass when:
- Fine pattern geometry is required
- The target is relatively small
- Dimensional stability is important
- The target can be handled carefully
- Reflections can be controlled
Choose ceramic when:
- Rigidity and flatness are important
- The target will be used repeatedly
- The application is industrial
- Stable mounting is required
Choose film when:
- A relatively large target is required
- Low weight is important
- A large rigid substrate would be impractical
- The film can be mounted flat without stretching or distortion
Choose paper or PE when:
- The calibration requirement is moderate
- Low cost matters
- The target is temporary or replaceable
- Very high geometric stability is not required
The key rule is:
Do not choose a flexible substrate for a precision planar calibration unless its mounting and dimensional stability are sufficiently controlled for the required accuracy.
Step 3: How to Choose the Right Calibration Target Size
The correct calibration target size is determined primarily by the camera field of view and working distance.
A larger target is not automatically better.
If the target is too small, its calibration features may occupy only a limited part of the image, providing poor spatial coverage.
If the target is too large, the required pattern may not fit inside the field of view.
Choose a target that provides useful pattern coverage under the real calibration conditions.
Consider:
- Camera resolution
- Lens focal length
- Sensor size
- Working distance
- Field of view
- Target orientation
- Required calibration positions
- Whether the target will be tilted during calibration
For a wide field of view, a larger target is generally required.
For close-range or high-magnification imaging, a smaller target with finer features may be more suitable.
How Large Should the Checker Squares or Calibration Dots Be?
Overall target size and feature size are different specifications.
A target can fit inside the field of view while still having squares or dots that are too small for reliable detection.
Conversely, very large features may be easy to detect but provide too few calibration points across the image.
For a checkerboard, consider:
- Square size
- Number of squares
- Number of internal corners
- Number of image pixels across each square
For a dot target, consider:
- Dot diameter
- Dot spacing
- Number of dots
- Number of image pixels across each dot
The correct feature size must satisfy two conditions:
Each feature must be large enough for stable detection and localization.
At the same time:
The pattern must contain enough distributed features to support calibration across the useful field of view.
Target size and feature size should therefore be selected together.
Step 4: How to Choose the Right Calibration Target Accuracy
Calibration target accuracy describes how closely the manufactured geometry matches the intended geometry.
Depending on the target specification, relevant quantities may include:
- Feature position accuracy
- Square dimension accuracy
- Dot diameter accuracy
- Dot spacing or pitch accuracy
- Overall scale accuracy
- Manufacturing tolerance
The target should be accurate enough that its geometric errors do not become a significant limitation in the calibration.
This is especially important when calibration supports dimensional measurement rather than only distortion correction.
Also distinguish between nominal geometry and measured geometry.
Nominal dimensions are the design values of the pattern. In some high-accuracy calibration workflows, measured feature positions or measured scale values may be used instead when such verified data is available.
That is a general calibration principle and should not be interpreted as a claim that a particular product includes a measurement or certification report unless its specification explicitly states so.
What Is the Difference Between Target Accuracy, Flatness, and System Calibration Accuracy?
These terms describe different properties.
Target Accuracy
Target accuracy describes how closely the physical pattern matches its intended geometry.
For example, it may refer to the accuracy of dot positions, checker dimensions, or pattern pitch.
Flatness
Flatness describes how closely the target surface matches an ideal plane.
This matters because a planar calibration algorithm assumes that the reference features lie on a plane.
If the target bends or warps, the actual features exist at different depths.
System Calibration Accuracy
System calibration accuracy is the final performance of the complete calibrated imaging system.
It can be influenced by:
- Camera resolution
- Sensor sampling
- Lens distortion
- Lens quality
- Focus
- Target accuracy
- Target flatness
- Image contrast
- Feature-detection accuracy
- Calibration algorithm
- Number of calibration images
- Distribution of calibration poses
Therefore:
A high-accuracy calibration target does not automatically guarantee equally high system calibration accuracy.
It controls one source of error; the rest of the imaging and calibration process still matters.
How Much Calibration Target Accuracy Do You Actually Need?
Work backward from the required system performance.
General Camera Calibration
For intrinsic calibration and lens distortion correction, priorities usually include:
- Correct pattern
- Reliable feature detection
- Good image coverage
- Stable target geometry
Very high target accuracy may not be necessary if the application does not perform precise dimensional measurement.
Machine Vision Inspection
If calibration is used mainly to correct distortion or map image coordinates, the target requirement may be moderate.
If the calibrated vision system performs dimensional measurement, target geometry becomes more important.
Precision Measurement and Metrology
For dimensional measurement, target position, scale, and flatness errors should be controlled well enough that the target does not materially limit the measurement result.
Rigid substrates are generally more appropriate when stable planar geometry is required.
Stereo Vision and Robotics
Geometric errors in the target can propagate into estimated camera poses, depth, or coordinate transformations.
The more demanding the coordinate-accuracy requirement, the more important target geometry becomes.
The practical rule is:
Select target accuracy from the required system accuracy backward rather than choosing an arbitrary target tolerance first.
What Else Should You Check Before Buying a Calibration Target?
Pattern, material, size, and accuracy are the four primary decisions, but several additional specifications can affect real-world performance.
Flatness
Flatness becomes increasingly important for accurate planar calibration.
A flexible target attached to an uneven surface may have a correctly produced two-dimensional pattern but an incorrect three-dimensional geometry.
Contrast
Calibration features need sufficient contrast for reliable detection.
Poor contrast can reduce corner or dot localization quality.
Surface Reflectivity
Reflective surfaces can produce glare or saturation.
The target surface should be compatible with the intended illumination geometry.
Thickness
Thickness may matter when the target must fit a fixture, holder, calibration stage, or constrained mechanical setup.
Mounting
Determine whether the target will be:
- Handheld
- Fixed to a frame
- Mounted on a calibration fixture
- Attached to a wall or plate
- Positioned by a robot
The substrate and thickness should suit the mounting method.
Temperature and Environment
Where environmental conditions vary, consider whether the target and its mounting system remain sufficiently stable.
Customization
A custom calibration target may be required for:
- Non-standard dimensions
- Custom dot spacing
- Custom checker size
- Unique pattern geometry
- Special substrate material
- Special mounting requirements
Define the software and geometry requirements before specifying a custom target.
Which Calibration Target Should You Choose for Different Applications?
The following table provides a practical starting point.
| Application | Pattern Direction | Material Priority | Size Priority | Accuracy Priority |
|---|---|---|---|---|
| OpenCV camera calibration | OpenCV-compatible checkerboard or supported pattern | Stable substrate | Match camera FOV | Based on application |
| HALCON calibration | HALCON-compatible dot or supported pattern | Stable substrate | Match camera FOV | Based on application |
| Industrial machine vision | Software-compatible checkerboard or dot pattern | Rigid, stable substrate when geometry matters | Match inspection FOV | Higher for measurement tasks |
| Precision dimensional measurement | Algorithm-compatible pattern | Rigid and dimensionally stable substrate | Good field coverage | High |
| Stereo vision | Supported checkerboard or dot pattern | Stable target geometry | Visible to both cameras | Higher when dimensional accuracy matters |
| Robotics | Algorithm-compatible pattern | Rigid and repeatable | Match working distance | Based on coordinate-accuracy requirement |
| Large field of view | Supported pattern with larger overall dimensions | Depends on required rigidity and size | Large enough for useful coverage | Application dependent |
| High-magnification imaging | Fine calibration pattern | Precision rigid substrate | Smaller target with fine features | Higher when measurement is required |
Always confirm the requirements of the actual calibration software before ordering.
Common Mistakes When Buying a Calibration Target
Mistake 1: Buying the Target Before Checking the Calibration Software
Verify the supported pattern and geometric definition first.
Mistake 2: Choosing the Wrong Pattern
A checkerboard cannot replace a dot target when the algorithm requires dot centers.
Mistake 3: Looking Only at Overall Target Size
Correct outer dimensions do not guarantee suitable square or dot dimensions.
Mistake 4: Choosing Features That Are Too Small in the Image
Features that occupy too few pixels may be detected or localized unreliably.
Mistake 5: Choosing a Target That Is Too Small for the Field of View
Poor pattern coverage limits the usefulness of the calibration data.
Mistake 6: Ignoring Flatness
A planar calibration method assumes that the reference geometry is sufficiently planar for the required accuracy.
Mistake 7: Using an Uncontrolled Flexible Target for Precision Measurement
Bending, stretching, wrinkles, or mounting errors can change the physical geometry.
Mistake 8: Assuming Higher Target Accuracy Automatically Produces Higher System Accuracy
Final calibration performance also depends on the camera, lens, image quality, feature detection, calibration poses, and mathematical model.
Mistake 9: Ignoring Reflection and Illumination
A geometrically accurate target can still produce poor calibration images if glare prevents reliable feature detection.
Calibration Target Buying Checklist
Before ordering a calibration target, confirm:
- What calibration task will be performed?
- Which software or calibration algorithm will be used?
- Which pattern does the algorithm require?
- How many rows, columns, corners, or dots are required?
- What square size, dot diameter, or pitch is required?
- What is the camera field of view?
- What is the working distance?
- What overall target size fits the calibration setup?
- Are the features large enough to be detected reliably?
- Which target material provides the required rigidity and stability?
- What manufacturing accuracy is required?
- What flatness is required?
- Is surface reflection acceptable for the lighting setup?
- How will the target be mounted?
- Will it be used in an industrial or controlled environment?
- Is a standard target sufficient, or is a custom pattern required?
Answering these questions before purchase eliminates most calibration-target selection errors.
Conclusion: Which Calibration Target Should You Choose?
Choose a calibration target in this order:
First, choose the pattern according to the calibration software and algorithm.
Second, choose the material according to the required rigidity, flatness, dimensional stability, and environment.
Third, choose the target size and feature size according to the field of view, working distance, and image resolution.
Fourth, choose target accuracy so that target geometry does not become a significant limitation in the calibrated system.
In practical terms:
- Choose a checkerboard when the algorithm detects checkerboard corners.
- Choose a dot pattern when the algorithm requires circular calibration marks.
- Choose glass or ceramic when rigid, stable geometry is important.
- Choose film or paper-based materials when larger size, low weight, or lower cost matters more than maximum geometric stability.
- Choose the target size from the actual field of view.
- Choose accuracy from the required system performance, not simply from the highest available specification.